Monday, October 31, 2011

FRESHLY MADE SKETCHES #8

Wow! I didn’t realize how tight I am on time! This card is almost to late to enter the Freshly Made Sketches #8 challenge….

OK then, I’ll get right to it. Here is my card:

FMS8

and this is the sketch:

I really do love this card! It is a 6x6” square and uses MME Lost & Found Christmas paper, plus my fav Rubber Stamp Tapestry stamps. This set is called Gingerbread Wreath and has the cutest little gingerbread men in two sizes plus the candy canes and little gift boxes and the foliage.  The details in these stamps is just amazing.

My sewing machine got in on the action today with a little fun stitching around the wreath. A little more practice and I think I’ll have that going perfectly.

FMS8_2

I also used RST’s Merry Christmas Peg stamp on the sentiment tag at the bottom.  A Spellbinders die cut on some MME paper makes up the tag along with a little glam.

FMS8_3

Well thanks to the DT at FMS for this sketch! It was fun to work with and I love my card. I hope you like it too!

Complete instructions are listed below, so if you want all the details, please scroll down.

I hope you like my card and will leave comments before you leave! Thanks for stopping by….

signatureNew

Recipe

STAMPS

PAPER

  • MME Lost & Found Christmas
    • 6x6”
    • 4 1/4 x 4 1/4”
    • 1 1/4 x 6”
    • scrap for die cut
  • White paper
    • 3 3/4 x 3 3/4”
    • 3/4 x 4”

INKS

  • VERSACOLOR
    • Burgundy
    • Evergreen
    • Bark
    • Olive
  • Other
    • Gold metallic

TOOLS

  • Big Shot
  • Spellbinders Labels Four
  • Square punch
  • Martha Stewart double sided border punch
  • Sewing machine

ACCESSORIES

  • Ribbon
  • “Rhinestones”

INSTRUCTIONS

  1. Cut all paper
  2. Use Spellbinders Labels Four to cut label
  3. Use MS border punch on long MME strip
  4. Use Olive Versacolor Ink to lightly shade the white paper. Leave a small heart shape (I used RST Positioning Template to make a small heart)
  5. Use the Gingerbread Wreath set to create a heart shaped wreath on the now green square.
  6. Use the square punch to shape the ends of the white strip.
  7. Stamp Merry on one end and Christmas on the other end of the strip using RST’s Merry Christmas Peg.
  8. Sew the small square onto the 4 1/4 x 4 1/4” square
  9. Adhere layers to card.
  10. Attach ribbon and “rhinestones”
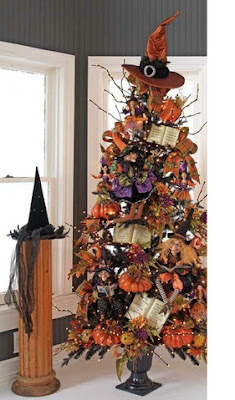
MyShabbyBlogsDividerH

Sunday, October 30, 2011

PDCC 105

Hello again to all my lovely crafty friends! LOL I love to watch Joy playing with her blanket, which she is doing right now.  It is in her crate but she likes to pull it out and drag it around. She is SO full of energy this time of day, and that is after a good long walk!  She is really growing fast now…. Just 6 weeks ago she was 4 pounds and now she is 10 pounds.  She is quickly becoming my crafting buddy.

Today, I have a card that was inspired by the Play Date Café Challenge PDCC 105 with this weeks colors being Kraft/Taupe...Flesh...Cadet Blue. First for my card:

Snoman

and now their inspiration photo:

Aren’t those yummy colors?  I just love that combination and how it looks on my card.  The papers are ATD Jack Frost and MME Lost & Found Christmas.  The cute snowman is fussy cut from the Jack Frost paper. 

Snoman2

The sentiment is on a piece of flesh colored cardstock that is cut using the Spellbinders Labels Four.  I used Rubber Stamp Tapestry’s Small Oval Positioning Template  with their Winter Night Sky Set and metallic inks to decorate the label and then stamped it with RST’s Merry Christmas Peg Stamp – Mini.  The glossy finish comes from an embossed finish I applied to the label.

Complete instructions are listed below, so if you want all the details, please scroll down.

I hope you like my card and will leave comments before you leave! Thanks for stopping by….

signatureNew 

Recipe

STAMPS

PAPER

  • MME Lost & Found Christmas 5 x 7”
  • ATD Jack Frost 4 x 6 and the snowman
  • Flesh cardstock for Spellbinders

VERSACOLOR INKS

  • Atlantic
  • Polar Blue
  • Umber
  • Other Inks: Pigment
    • Blue Ice
    • Pewter
    • Copper
    • Silver Starlight

TOOLS

ACCESSORIES

  • Crinkle Ribbon – Blue
  • “Rhinestones” – Light blue
  • Bakers doily

INSTRUCTIONS

  1. Cut all paper
  2. Fussy cut the snowman from the Jack Frost paper.
  3. Use Big Shot and Spellbinders Labels Four on flesh colored card stock
  4. Use Oval Positioning Template on die cut.  I like to use a Q-Tip to outline the template shape in the color ink I am going to use as the background (in this case Polar Blue).  I then use a makeup sponge to lightly blend the same color from the outside of the template to the edge, leaving the oval shape in the base cardstock color.
  5. Next use Atlantic around the edge of the die cut to give it a darker outline.
  6. Stamp the die cut with the Winter Night Sky stamp set. Go ahead and stamp a few in the center oval too. I used the metallic pigment inks for this. If you want them to show up more use Versacolor Inks.
  7. Stamp Merry Christmas with the Merry Christmas Peg in the oval. I stamped mine a little on the diagonal since I wanted to mount my die cut on the diagonal.
  8. Run Versacolor Umber over the bakers doily to give it a flesh color.
  9. Adhere the 4 x 6 to the 5 x 7.
  10. Add the denim blue crinkle ribbon.
  11. Position the bakers doily so it will be beneath the snowman and adhere.
  12. Cut a small piece of the ribbon and tie it around the snowman’s neck to make a scarf.
  13. Position the die cut and snowman and adhere.
  14. Place “rhinestones” as desired.
  15. Tie a bow and attach by snowman on the ribbon.


Saturday, October 29, 2011

Inkspirations Challenge #93

To all my wonderful blogging friends, I hope you are having a wonderful weekend! It turned “cold” here (that means it got into the 40’s) and this morning was a little rainy so I was able to spend time playing with paper today.  I also am staining a table I bought to set my sewing machine on!!! That means I’ll be able to start stitching on my cards! Yea!!!!!

So, today I have a card for you that I am submitting to Inkspirations Challenge #93.  This is my first time placing a card in their challenge so I am very excited.  Oh, here is my card:

Merry Christmas Holly

and here is their sketch:

Since I like layers on cards, I fell in love with this sketch!  All those pretty layers offering so many possibilities make me very happy.  I ended up combining two different coordinating sets of paper; one from DCWV The Four Seasons and one from MME Lost & Found Christmas.  The gorgeous greens and reds are from DCWV and the soft kraft/brown is from MME.  I also used my new Cuttlebug embossing folder on the base layer and highlighted the little dots with red glitter glue.  My sewing machine got in on the action by stitching up my ribbon.  She is so happy to be out and used again.

Merry Christmas Holly2

For this medallion, I used a scrap of the DCWV paper and Spellbinders Big Scalloped Circles Large to make a base. I then used a 3” circle punch on white paper and Rubber Stamp Tapestry’s Cardinal Resting in Holly Set to make the design.  I also used their Merry Christmas Peg Stamp - Mini to add the sentiment.   Once it was all stamped and the ink was heat set, I used a Versamark stamp pad over the entire circle; then added SU Stampin’ Emboss – Clear to give the medallion a shiny finish.

The card is then finished off with my stitched ribbon, Prima poinsettias, red glitter glue and red half-pearls.  Complete instructions are below, so just scroll down if you want details.

Thank you so much for visiting my blog! I’m so happy you stopped by. Please remember, I love comments and enjoy reading every single one that is left.  Until next time, have a stampin’ good time!

signatureNew

Recipe

Stamps:
Paper:
  • DCWV The Four Seasons
  • MME Lost & Found Christmas
  • White cs
  • Black cs

Versacolor Inks:

  • Charcoal
  • Evergreen
  • Olive
  • Cardinal
  • Burgundy
Accessories:
  • Red grosgrain ribbon
  • Cuttlebug embossing folder
  • Deep red half-pearls
  • Spellbinders Big Scalloped Circles Large
  • Red glitter glue
  • Prima Poinsettias
Measurements (approximate):
  • The card is standard 5 x 7 .
  • Base panel DCWV The Four Seasons 5 x 7 embossed with Cuttlebug 
  • Black cs 5 1/4 x 3 1/4
  • MME 5 x 3
  • MME 4 x 2
  • DCWV Same as base for Spellbinder die
  • DCWV Red border from same set is approx 1 1/2” wide, so cut 2 pieces 5” and use them together to make a 3” panel to go across the card
  • White cs for 3'” circle punch


Instructions

  1. Cut all paper pieces
  2. Emboss the base panel
  3. Cut base for medallion using Spellbinders. I used the next to largest one.
  4. Stamp the circle with Rubber Stamp Tapestry Cardinal Resting in Holly Set , and Merry Christmas Peg Stamp - Mini then use heat gun to heat set the ink. 
  5. Use Versamark pad to cover circle and then add SU clear embossing powder. Make sure you cover the entire circle completely and then heat with heat gun.  The colors will pop out as you do this and the finish will be glossy.
  6. Adhere all layers and ribbon.
  7. Add pearls, flowers and red glitter glue

Friday, October 28, 2011

CAS-UAL FRIDAY CFC26

Hi everyone! I have the opportunity to make a special card for my karate instructor, who is actually a Grand Master that just received his promotion to 10th Dan (10th degree black belt…highest rank possible in our system). So, as you can see, this an especially important card for me and any comments/suggestions are welcome! (By the way, I am retired from karate now but still dream of practicing!)

This is my card and I am entering it into Cas-ual Friday’s CFC26 challenge this week.

Hanshi

and here is the CFC26 sketch:

If you follow my blog, you know I don’t usually do CAS cards, but I am trying to learn how to make a simple and elegant card.  This is a 5.5 x 4.25” card in white.  The red ribbon is symbolic of his belt which is red. It is tied the way we tie our belts in our system.  I stamped the bamboo on the white panel of the card, but it just didn’t stand out enough, so I stamped it in a more colorful green, cut it out and mounted it on foam dimensional glue dots to give a 3D effect.  I love my new Cuttlebug embossing folder that I used on this card. I look forward to using it a lot more!

Hanshi2 

The medallion was originally just the circle but the card looked way too plain for me. So, I added the Spellbinders Labels Two layer and used the foam dimensional glue dots on the circle to elevate it.  My Black Belt name is Dragonfly, so I used dragonfly stamps from the Rubber Stamp Tapestry stamp set Dragonflies at Dusk.

I really would like to get comments before I give this to him next week!  I know, it shouldn’t be any different that making any other card, but I really want it to be special….. Thank you for visiting my blog and please leave comments for me!!!!

hugs,

signatureNew

Recipe

 
Stamps:
Paper:
  • The Mariposa Stack
  • White

Versacolor Inks:

  • Sage
  • Bamboo
  • Old Rose
  • Polar Blue
  • Canary
Accessories:
  • Red grosgrain ribbon
  • Cuttlebug embossing folder
  • Deep red half-pearls
  • Spellbinders Labels Two
  • Stamp for medallion frame (I don’t have the name of the manufacturer, but any circle will do)
Measurements (approximate):
  • The card is standard 5 1/2 x 4 1/4size.
  • Base panel white 5.1/2 x 4 1/4 embossed with Cuttlebug 
  • White for medallion: 2 1/4" x 2 1/4” 
  • Patterned Mariposa scrap for Labels Two
Instructions
  1. Cut all paper pieces
  2. Emboss the base panel
  3. Stamp Bamboo stalk on base
  4. Stamp Bamboo in a darker green on a scrap and cut out with craft knife
  5. Cut base for medallion using Spellbinders Labels Two
  6. Stamp the circle frame and cut out. Then either cut out the center or use a circle punch to cut it.
  7. Use scrap of white to make sentiment. Stamp with Rubber Stamp Tapestry Dragonflies at Dusk or stamps of your choice.
  8. Adhere all layers and ribbon.
  9. Add pearls

Tuesday, October 25, 2011

TSTR WEEK 85–HAPPY HALLOWEEN & TSG127

I cannot believe it is the last week of October already! Wow, Thanksgiving will be here in a blink and OMG Christmas is right behind it!  If you are like me, you have so much to do and so little time, but I wouldn’t have it any other way. I love being busy with fun projects and decorating.
The card I am sharing with you today will be entered into four challenges. Yikes! That is a first for me!!!  But first let me show you my card!!!
TSTR 85 Happy Halloween
This card is entering these 4 challenges:
  • TSG127 make a card or project with the theme of either Halloween or Autumn


I am so excited to be entering more challenges! I am still learning a lot about card making and all of you are helping me with your gorgeous creations!  I love to sit and go through these challenges and see each and every card and see what you all are doing with papers, elements, inks, crochet, ribbons, LOL that list just keeps on going.
OK today’s card is a standard 5x7 card….white cardstock.  Gorgeous paper from DCWV’s The Four Seasons is used as well as plain black and white cardstock.
The black panel is folded lengthwise and then run through my crimper on the diagonal. I ran it half way through then turned it around to do the other half.  If you don’t do this, the paper is too long to crimp properly all the way down.   The result is the pretty inverted V you see below.
TSTR 85 Happy Halloween3
The medallion is made with some stamps that I have had for a long time, and unfortunately I don’t know where they came from. But I just love this little cat and the Trick or Treat sentiment.
TSTR 85 Happy Halloween2
The TSTR challenge called for raffia or twine. Since I had neither, I used some black hemp under the bow.
The instructions for making this are below. I hope you like my card and will leave comments! Thank you so much for visiting my blog.
signatureNew
Recipe
Paper:
  • DCWV The Four Seasons
  • White
  • Black
Accessories:
  • EK Success corner rounder
  • Fiskar’s Crimper
  • Wire edged ribbon
  • 1/4” purple satin ribbon
  • Cuttlebug embossing plate (spider web on base panel)
  • pearls
  • Glitter glue
Measurements (approximate):
  • The card is standard 5x7size.
  • Base panel DCWV 4 3/4 x 6 3/4” 
  • White for medallion: 2 1/4" x 2 1/4” 
  • Patterned DCWV brown: 1 1/4" x 5"
  • Black panel: 2 x 5 3/4”
Instructions
  1. Cute all paper pieces
  2. Emboss the base panel
  3. Fold the black panel lengthwise and crimp. Run through the crimper on the diagonal. When it is about 1/2 way through, remove it, turn it and crimp the other half.
  4. Stamp cat and cut out.
  5. Adhere cat to small white cardstock. Use distress ink to distress the white but make sure a little white “shadow” shows around the cat. 
  6. Adhere all layers and ribbon.
  7. Add pearls and place small dots of glitter on the eyes and nose of the cat.

Monday, October 24, 2011

MOJO MONDAY 212 and CR84FN41

Happy Monday to all my sweet friends! I hope your weekend was as wonderful as mine and your Monday was awesome!
Today, I have a card for you that is inspired by the Mojo Monday 212 sketch and the beautiful colors from the CR84FN41 challenge.
First for my card:
CR84FN41_MM
And here is the inspiration:

I just love the color combination of Steel Blue, Gray and Yellow.  And the layout from Mojo Monday was so much fun to work with. 
The base of the card is gray textured cardstock with an added layer of white cardstock embossed with a Cuttlebug embossing template of snowflakes.  The top layer is a base of steel blue topped with white cardstock that is designed with the Winter Night Sky Set from Rubber Stamp Tapestry
CR84FN41_MM3
The tag is stamped with the same stamp set and with RST’s Merry Christmas Peg Stamp – Mini . It is then finished with denim blue crinkle ribbon and embellished with 3 blue half-pearls.
CR84FN41_MM2
Thank you so much for visiting with me today. Please don’t forget to leave comments before you leave my blog!!! Your comments are always appreciated.
signatureNew
Recipe

Stamps Used:

Rubber Stamp Tapestry

Ink List:

  • VersaColor® Polar Blue Ink-Cube Pad
  • VersaColor® Split Pea Ink-Cube Pad
  • VersaMagic® Dew Drop™ Aegean Blue
Paper:
  • Light Gray
  • Dark Gray
  • White
  • Patterned steel blue

Accessories:

  • EK Success corner rounder
  • Spellbinders Label Two (smallest size)
  • Denim blue crinkle ribbon
  • Cuttlebug embossing plate
  • pearls
  • Glitter glue

Measurements (approximate):

  • The card is standard A2 size.
  • Dark Gray:4" x 5 1/4"
  • White embossed: 2 1/4" x 3 3/4"
  • Patterned steel blue: 1 3/4" x 3"
  • White panel for stamping: 1 1/2 x 2 3/4”
  • Light Gray: 4 1/4" x 11" folded for base.
  • White scrap for sentiment
Instructions
  1. Cute all paper pieces
  2. Emboss the white panel
  3. Stamp the smaller white panel with Winter Night Sky stamp set
  4. Stamp Merry Christmas on white scrap.
  5. Use Spellbinders Label Two smallest size die cut. Position this die over Merry Christmas so it is centered and make tag using Big Shot (or die cutting machine of your choice)
  6. Stamp tag with Winter Night Sky set. Set a brad in the top of the tag for ribbon to come through.
  7. Adhere all layers and ribbon.  Be sure to pull ribbon through the brad and tie small bow. Add pearls and place small dots of glitter on some of the snowflakes and stars.
MyShabbyBlogsDividerH

Sunday, October 23, 2011

THE PDCC104 CHALLENGE

Wow, this is the second of two posts today! Click here to see the first post.

Time now to play in The Play Date Cafe Challenge PDCC104 and Mojo Monday’s Mojo Monday 211.

First, my card:

TPDCC 104A

And now for the sketch and inspiration photo:


I don’t know about you, but I just love those colors in the PDCC challenge. 

This card starts with an very light grey cardstock cut 5.5x8.5” and folded to make a 4.25x5.5” card.  A dark mauve piece of paper from DCWV The Far East is embossed with a Sizzix embossing folder and sanded slightly to reveal the white below the design. Another piece of white is cut to the same size and the pattern is designed using Rubber Stamp Tapestry’s Vintage Crochet set

TPDCC 104B

The medallion is yellow textured cardstock cut using Spellbinders Labels Four  and embellished with Misty Mauve VersaColor inked edge, RST’s Vintage Crochet set and Koala Peg Stamp – Mini , and finally 3 half-pearls.  The sentiment is white cardstock cut using Spellbinders Big Scalloped Circles LG and stamped with the same Vintage Crochet set plus RST’s  Just For You Peg Stamp – Mini .

I hope you like my little card. Please tell me what you think before leaving. Thank you so much for visiting and for your comments.

signatureNew

Recipe

Rubber Stamp Tapestry: Vintage Crochet set , Koala Peg Stamp – Mini , Just For You Peg Stamp – Mini .

Paper: DCWV: The Far East, 2 1/8 x 5 1/2; White cardstock, 2 1/8 x 5 1/2, and 1 1/2 x 1 1/2 for sentiment; Very light grey cardstock 4 1/4 x 5 1/2; Yellow textured cardstock 2 x 3 1/2

Spellbinders: Labels Four; Big Scalloped Circles LG

VersaColor Inks: Misty Mauve, Bamboo, Evergreen, Ash Rose, Pinecone, Olive

Sizzix embossing folder

Misc: half-pearls,mauve ribbon, Stickles

MyShabbyBlogsDividerH

QUILLING FOR CHRISTMAS

Hi sweet crafty friends! I hope you are having a Super Sunday and that your weather is as gorgeous as ours is.

Yesterday’s card (here) had me thinking about my Thanksgiving menu – all day long. It is way to early for that! I do love Thanksgiving, being with family, and the Thanksgiving Day parades lead me right into Christmas decorating. So it is appropriate that yesterday’s card led me back to a Christmas card that I want to share with you today.  And yes, it is a card with quilling but I do enjoy adding quilled items to my cards… ok, here it is:

Merry Christmas Quilling

Other than the quilling, this is a fairly simple card using a 6x6 that I made from double-sided DCWV Christmas paper.  Using white cardstock and Rubber Stamp Tapestry’s Christmas Love Set, I designed the paper for the next layer.  Using sage green VersaColor, I sponged the outer portion of the cardstock leaving an area (about 3x3.5”) clear in the center.  I then stamped the green area with the Christmas Love set.  I love all the stamps in this set. It has solid poinsettias, fringed poinsettias, deer, snowflake, a tiny little package and of course the love stamp.  If you have never seen Susan’s stamps, you should visit her website and see what she is doing!

I used Spellbinders Fleur de Lis Rectangles, the 2¾ x 3¼″ size to cut an element to mount over the white area. I used the same paper from DCWV that I used for the card.  I then mounted my quilled poinsettias to the rectangle. I added a little glitter to the quilling to give it some Christmas sparkle.

Merry Christmas Quilling5

For the sentiment, I used one of RST’s positioning templates to shape the sentiment tag.  I ran a piece of white cardstock through my Fiskar’s crimper, sponged it with sage green VersaColor ink and cut it out using the positioning template to guide me. I then layered that on another scrap that matched the card base and scissor trimmed the lower layer a little larger than the green one.  You can see I embellished the sentiiment tag with the Christmas Love Set and the Merry Christmas Peg Stamp – Mini . A small half-pearl and a couple of Prima poinsettias complete the sentiment tag.

Merry Christmas Quilling4

A small strip of polka dot paper, half of a baker’s doily and grosgrain red ribbon complete the card. 

Merry Christmas Quilling3

I hope you enjoyed your visit! Please take a moment to leave comments and let me know what you think of this card.
signatureNew
Recipe
Rubber Stamp Tapestry: Christmas Love Set, Merry Christmas Peg Stamp – Mini
Paper: DCWV: 6x6” base, 3x3.5″ for medallion, 5.5x4.5” top layer, 5.5x1” strip of polka dot
Spellbinders: Nestabilities Fleur de Lis Rectangles: 2.75 x 3.25″
VersaColor Inks: Sage Green, Green Tea, Evergreen, Burgundy, Charcoal, Olive
Misc: half-pearls,red saddle-stitched grosgrain, Stickles, Prima flowers, bakers doily
MyShabbyBlogsDividerH
Related Posts Plugin for WordPress, Blogger...